Wednesday, May 2, 2012

No Worries, Mon!

I'm freeeeeee!

Yes, ladies and gents, I have officially completed my undergraduate degree. It hasn't completely sunk in yet and I'm still worried that I'm forgetting to study or complete an assignment.

For now, the plan is to watch copious amounts of Criminal Minds and get to the gym more consistently. One of these two will be very difficult.

So, in honor of my freedom from the chains of college, I present to you a island-worthy recipe that will make you feel like you're on the beach basking in the sun.

This Coconut Rice & Jamaican Jerk Chicken will blow you away.

Serious. 


This recipe comes from Iowa Girl Eats.  Her blog is amazing and every single recipe is out of this world. When I saw this recipe on her page, I knew it had to happen.

And it did.

There are a lot of different components to this marinade, but it's so worth it.

First you'll take allspice, thyme, sugar, sage, nutmeg, cinnamon, and cayenne and combine in a bowl. 


Then you'll add vinegar, orange juice, olive oil, soy sauce, lime juice, green onion, onion and garlic.

Mix it all together and allow the chicken breasts to thaw and marinate. 


Because I'm crazy and can't leave anything alone, I would stab and turn the chicken with a fork every 45 minutes or so. You don't have to do that.

I let them marinate for pretty much all day. I left them on the counter because they were frozen. If the chicken you are using is already thawed then stick it in the refrigerator. 

When the chicken is ready to cook, you can either grill them or broil them. I broiled them and they turned out fine, but you can do whatever you want.

While the chicken is cooking, go ahead and make the rice.

In a large pot, heat coconut oil.


Add garlic, green onion and thyme and cook for a few minutes.


Then throw in kidney beans, water, and coconut milk and bring to a boil.


When it's ready, throw in the rice and salt.

Turn the heat down and let it simmer for roughly 20 minutes.


You may feel the urge to taste the rice. This urge is completely normal. However, once you taste it, you won't stop eating it. Don't say I didn't warn you.


I don't have any specifics on the cooking time for the chicken. Just cook it until it's done. That concludes my advice for the night.


Coconut Rice & Jamaican Jerk Chicken
Recipe adapted from Iowa Girl Eats 
*serves 6

Jamaican Jerk Chicken
  • 6 boneless, skinless chicken breasts
  • 1 1/2 tbsp allspice
  • 1 1/2 tbsp thyme
  • 1 1/2 tbsp sugar
  • 2 1/4 tsp sage
  • 1 1/8 tsp nutmeg
  • 1 1/8 tsp cinnamon
  • 3/8 tsp cayenne 
  • 1 1/8 cup vinegar
  • 3/4 cup orange juice
  • 3/8 cup olive oil
  • 3/8 cup soy sauce
  • Juice of 1 1/2 limes
  • 3 green onions
  • 1 1/2 onion
  • 7 1/2 cloves of garlic
1. Combine all the ingredients and marinate the chicken for at least 4 hours.

2. Grill or broil chicken until done.

Coconut Rice
  • 1 1/2 tbsp coconut oil
  • 1 1/2 garlic cloves, minced
  • 1 1/2 green onion
  • 3/8 tsp thyme
  • 1 can kidney beans (drained, rinsed)
  • 1 1/2 water
  • 1 can coconut milk
  • 1 1/2 cup long grain rice
  • 3/4 tsp salt
1. Heat coconut oil in large pot. Add garlic, green onion and thyme. Cook for a few minutes.

2. Add drained and rinsed kidney beans, water and coconut milk. Bring to boil.

3. Add in rice and salt. Turn heat down to medium to low, cover and simmer for roughly 20 minutes.

***

Guys, this dinner was fantastic. The rice was creamy and so flavorful. The chicken was moist and bursting with so many different flavors.


I put barbeque sauce on my chicken. You don't have to but I think it took it over the top!


I could eat this rice every single day. The coconut flavor isn't overwhelming, in case you were worried. 

It's so creamy and I love that the kidney beans add a little extra protein.


This dish is so easy and perfect. There was a little bit of rice leftover and I ate it for lunch the next day and I'm pretty sure it tasted better the second day.

Next time, I may or may not double the recipe.


Enjoy!

Kaci

Monday, April 30, 2012

I'm Back!

It's been a long time since I've posted a recipe.

Turns out, the last few weeks of college is a bad time to start a blog.

I'm one final away from completing my undergrad and I'm so excited to have more free time to devote to this blog. So, thank you for being understanding and I hope this new recipe will make up for my absence!


This recipe is great because it feeds me (gluten-free) and my whole family (not gluten-free) with a minor omission. That's a win-win.

First, take some ground beef and brown it up.


Then throw in a pepper, onion, steak sauce and beef stock and cook it all together.


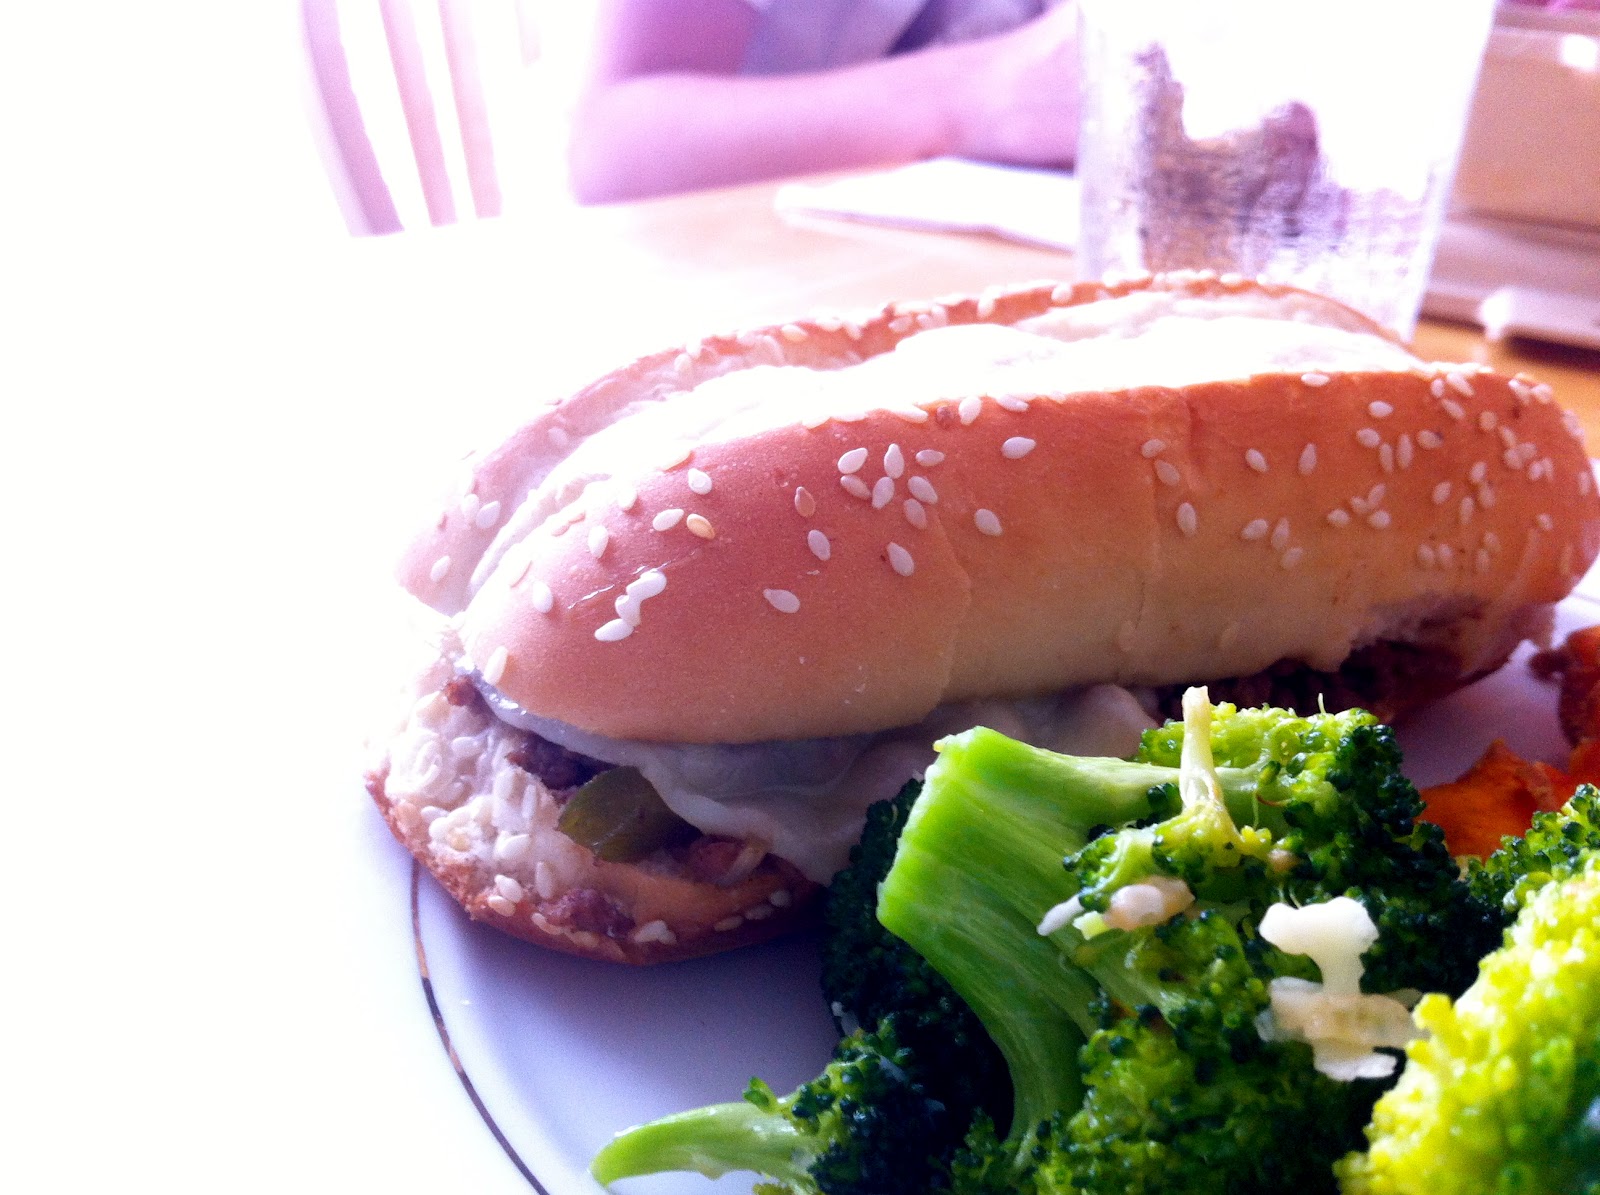
Put the mixture on some rolls, top with provolone cheese, broil and serve. 


If you're gluten-free, then put the mixture on the plate and top with cheese.


Philly Cheesesteaks
Recipe adapted from Pass the Sushi

  • 1 tsp olive oil
  • 1 lb ground beef
  • 1 onion
  • 1 green pepper
  • 2 tbsp steak sauce
  • 1 cup beef stock
  • Provolone cheese
  • Hoagie rolls
1. Put olive oil in pan and brown beef.

2. Add in diced pepper and onion. Cook for roughly 5 minutes.

3. Add in steak sauce and beef stock. Simmer until liquid reduces by half.

4. Spoon on to hoagie rolls and place slices of provolone cheese on top. Broil the roll, meat and cheese until cheese is melted.

5. Place other half of roll on top and serve.

* Gluten-free - omit roll.

***


This was such a quick and easy meal. It would be great for a busy weeknight!


I love that this can easily be gluten-free, or adapted for the health conscious! By leaving out the roll, you can save around 200 calories.

And honestly, I didn't even miss the roll. 

My favorite part of this meal was the supporting cast.

Sweet Potato Fries for my mom and I...


...and fries for the rest.


For the fries, I coat the cut potatoes with olive oil, salt, pepper, garlic powder and grated parmesan cheese.

I baked them on a cooling rack at 400 degrees. I didn't set a timer. I just checked on them and pulled them out of the oven when they were how I wanted them.

 In the other corner, my favorite, roasted broccoli.


Olive oil, salt and shredded parmesan cheese. Baked at 400 degrees until they reach the desired consistency.


Broccoli isn't really my favorite, but when it's cooked like this, I could eat it all day, everyday. 


This was a great, filling meal that didn't weigh me down. I would let you know if it makes great leftovers, but there wasn't any leftover.

It's good to be back!

Enjoy,

Kaci

Sunday, April 15, 2012

Our Little Secret

I have a thing for individual portions.

It's a weird obsession, I know. But for some reason when the word "mini" and "individual" are used in the same recipe, I'm 98% more likely to make it.

That's what happened when I stumbled upon a recipe for individual mini apple pies.

I haven't had a slice of apple pie in forever because of the crust. When I saw this recipe, I knew that it would be so simple to modify and make gluten-free.

These are honestly the best thing ever. They take a little elbow grease, but the outcome is a wonderful, warm apple pie. And your house will smell amazing.

Have I convinced you yet?


First take 6 apples. I used Granny Smith because they seem to be the best for baking.


You're going to want to cut the top off the apple. Then, using a melon baller, scoop out and core the apple. Don't throw away the inside. Once you have hollowed out the apple, submerge into a mixture of lemon juice and water, then turn upside down to drain.

I didn't get any pictures of this step because I had to work fast to make sure the apples wouldn't get really brown.

Once all the apples are hollowed out, throw away the core and chop the insides into small pieces.

Mix the pieces with sugar, brown sugar, cinnamon and cornstarch.


Place the apples into muffin tins. Spoon the mixture into the apples until they are full.


In a bowl, mix brown sugar, cinnamon, oats and cut in cold butter. 


Place crumb mixture on top of the apples.


It's messy, but beautiful. You'll see.

Bake for 30-35 minutes at 375 degrees.


Mini Apple Pies
Adapted from Jo In The Kitchen 

Apple Pies:
  • 6 apples
  • 1/3 cup sugar
  • 1/3 cup brown sugar
  • 1 tsp. cinnamon
  • 1 tsp. cornstarch
  • Juice of 1 lemon + 1 cup water
Crumble:
Recipe from Simply Recipes

  • 1/2 cup brown sugar
  • 1/4 tsp. cinnamon
  • 1/2 cup oats
  • 1/4 cup cold butter
 
1. Preheat oven to 375 degrees.

2. Cut tops off and hollow out apples.

3. Submerge apples into lemon water mixture and turn over to dry.

4. Cut up the insides of the apples and mix with sugar, brown sugar, cinnamon and cornstarch.

5. Place apples in a muffin tin and fill with mixture.

6. Top with crumble mixture.

7. Bake for 30-35 minutes.

***
I took mine and nestled it up to a scoop of vanilla ice cream and drizzled some caramel sauce on top.


This is seriously indulgent. Plus, I don't feel too bad about eating one of these since there is no crust on it. Right?

Don't answer that.


These are so yummy and such a treat.

They would be so nice on a crisp fall afternoon or a great 4th of July snack for all your friends and family. They would be so impressed with your culinary skills.

I mean, I even impressed myself with these! But that will be our little secret.


Enjoy!

Kaci

Thursday, April 12, 2012

Test Your Fire Alarms, Please.

Here's a friendly reminder to make sure your fire alarms are in working order. You can do it the traditional way like everyone else or do it my way.

And honestly, my way is a tad more delicious.


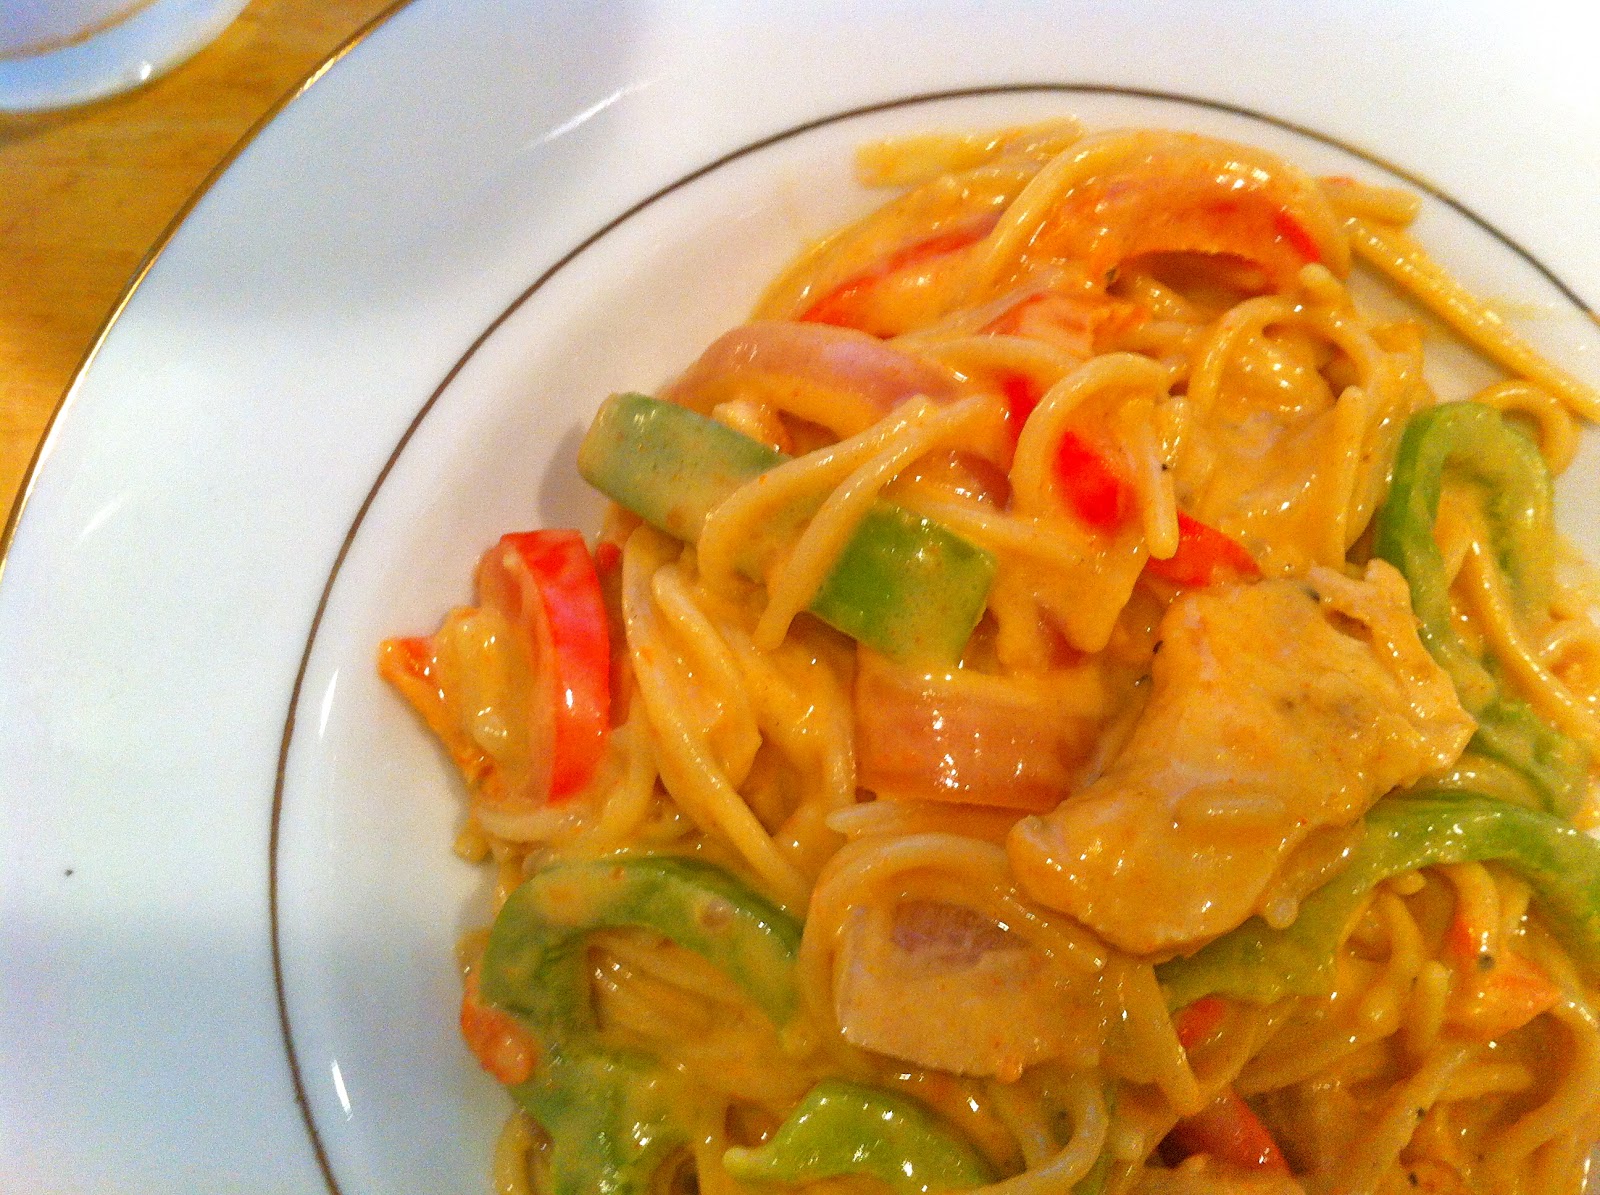
This dish is phenomenal. Trust me. My father, whose favorite dish is Cajun chicken pasta, won't order it from the restaurant menu anymore because it's not as good as mine.

Boom.

First cut up 3 thawed boneless, skinless chicken breast. Layer each one with some Cajun seasoning, like so.


Then cut up a red onion, red pepper, green pepper and Roma tomatoes. 


I usually do this ahead of time and let it sit in the refrigerator for a few hours. You don't have to do this, but I like to let the Cajun seasoning soak into the chicken.

Boil a pot of water and cook the pasta.

Meanwhile, melt butter and olive oil over high heat. When melted put chicken in the pan in a single layer.


Wait until one side is browned, then flip and cook the other side. Use a slotted spoon to take the cooked chicken out and put on a plate. It takes me 3 times to cook all the chicken.

This is where I set the fire alarms off. Just FYI. 

Then add more butter and oil. Once melted, add the peppers, onions and garlic. Sprinkle with more Cajun seasoning and salt. Cook over high heat for 1-2 minutes while stirring.


Then add the tomatoes and cook for an additional 30 seconds to a minute. Stir continually.


Transfer the veggies to another plate.

Over high heat, put chicken broth and a few splashes of white wine vinegar in the same pan. Scrape the pan while cooking for about 3 or 4 minutes.

Reduce the heat to medium-low and pour in cream. Cook for a few minutes, until it begins to thickens, whisking constantly. 


Taste the cream. Add cayenne pepper, salt and pepper to taste. I like it really spicy, some don't. It's up to you.

Once it tastes how you like, add the chicken and veggies back in. Cook for a few minutes until bubbly and hot. 


Add to the cooked pasta and combine.

At first the sauce will seem a little thin, but keep stirring and it will thicken up.


Cajun Chicken Pasta
Adapted from The Pioneer Woman

  • 3 boneless, skinless chicken breasts
  • 3 tsp Cajun seasoning
  • 1 lb. gluten-free spaghetti 
  • 2 tbsp. olive oil
  • 2 tbsp. butter
  • 1 green pepper
  • 1 red pepper
  • 1 red onion
  • 3 cloves minced garlic
  • 4 Roma tomatoes
  • 2 cups chicken broth
  • 2 splashes of white wine vinegar
  • 1 cup heavy cream
  • cayenne pepper
  • black pepper
  • salt
1. Cook pasta. Cut up veggies and chicken.

2. Sprinkle Cajun seasoning on chicken pieces.

3. Heat 1 tbsp butter and 1 tbsp oil in skillet over high heat.

4. Add chicken in a single layer. Do not stir. Let them brown and then flip. Remove with a slotted spoon and set aside on a plate. Continue until all chicken is cooked.

5. Add 1 tbsp butter and 1 tbsp oil to the skillet. When melted, add peppers, onions and garlic. Sprinkle with Cajun seasoning and salt. Stir and cook for 1 to 2 minutes. Add tomatoes and cook for 30 seconds to 1 minutes. Remove from pan and put on plate.

6. Over high heat, add the chicken broth and white wine vinegar. Scrape the pan and cook 3-5 minutes.

7. Reduce to medium-low, add in cream. Cook for a few minutes until it thickens, whisking constantly. Taste and add cayenne pepper, black pepper and salt.

8. Add chicken and veggies and heat until bubbly.

9. Combine with cooked and drained spaghetti.

***


You guys, you have to make this. It's easy and so delish.


This is such a good dinner and it makes excellent leftovers.


My favorite part is that the veggies are soft but still crunchy. I hate mushy vegetables. 


I could eat this stuff everyday. 


Not only did I give you an amazing dinner, I also set off your fire alarms/reminded you to do so.

I'm all about giving, you see.

Enjoy!

Kaci