Friday, March 30, 2012

Fair Food (Minus the Fair)

Apparently, everyone likes fair food. From turkey legs (blah!) to fried snickers (seriously?), fair food can be quite disgusting interesting. 

I don't like fair food. It grosses me out. 

A staple of the fair food menu would probably have to be corn dogs. 

I've never had a corn dog. Ever. Another thing that grosses me out. 

However, a lot of people (including a few members of my family) love corn dogs. So when I decided to make some finger foods for dinner one night, the recipe for mini corn dog muffins was at the top of my list. 


NOTE: These are not gluten-free, therefore I did not eat them. My family did say that they're amazing, though!

First, put the melted butter and sugar in a bowl and whisk together.


 Then add the eggs and whisk


The buttermilk will now join. Whisk.


Set that aside. In a separate bowl, combine the baking soda, cornmeal, flour and salt.


Add half of the dry ingredients to the wet and mix well. Then add the rest. Mix well.


Cut hot dogs into 1" pieces. Spoon 1/2 a tablespoon in a greased mini muffin tin. Then push one hot dog piece into the middle.


Bake for 10 minutes, or until golden brown. Let cool about 5 minutes before removing from pan.


These little guys were so cute. My family really enjoyed them! This is another great game day recipe that is so easy to throw together.

Mini Corn Dog Muffins

Recipe from Iowa Girl Eats

  • 1/2 cup melted butter
  • 1/2 cup sugar
  • 2 eggs
  • 1 cup buttermilk
  • 1/2 tsp. baking soda
  • 1 cup cornmeal
  • 1 cup all-purpose flour
  • 1/2 tsp. salt
  • 8-10 hotdogs 
1. Preheat oven to 375 degree.

2. Combine melted butter and sugar, then whisk. Add eggs and buttermilk, whisking after each addition. Set aside.

3. In another bowl, combine baking soda, cornmeal, flour and salt. Add half of the dry ingredients into the wet ingredients, whisk. Then add the other half. Whisk to combine.

4. Spray the mini muffin tin with non-stick spray. Spoon 1/2 tbsp of batter into each cup. Drop 1" piece of hot dog and press into middle.

5. Bake until golden brown, around 8-10 minutes. Cool 5 minutes before removing.

***
Since I did not try these, I cannot tell you how wonderful these were. But, my family ate a lot of them and even took them for the lunch the next day. So they passed the leftover test and when I asked my sister if they were good enough to put on the blog, she replied "YES" in caps. Apparently that's a good thing? Teenagers. Weird creatures, aren't they?

Anyway.

So, if you like corn dogs, then eat these. And you won't have to worry about the crowds or the nastiness of the fair.

You're welcome.

Kaci

Wednesday, March 28, 2012

I've Got My Head In The Clouds

Finding out that I was sensitive to gluten has been such a blessing because I'm not in pain anymore and I now have the energy to live a normal life. 

There are down sides, however. Every meal has to be planned ahead and I no longer have the luxury to "pick something up" when I'm hungry. 

It's even worse when it comes to desserts. Cookies, cakes and pastries are completely out of the question. Unless I make them myself, I can't enjoy these sweet treats. I have found a few places that make gluten-free cupcakes, but those can be quite expensive.

So what is a gluten-free person supposed to do when a sweet craving hits? 

I have the solution. A delicious, chocolatey solution. 


Please don't be fooled. These are not just for the gluten-free.

My family freaks out when I make these. And I freak out because they are so easy.

That's when you know a recipe is a real winner.

To make these gems, first start with 3 room temperature egg whites.

  • Tip #1 - The egg whites need to sit out for a few hours to reach room temperature. I put mine in the bowl at 8:00 a.m. and they were ready at 12:30 p.m.

  • Tip #2 - The easiest way to separate an egg is to place the egg in your hand after you've cracked it, and transfer the yolk from hand to hand. Make sure you have a bowl underneath your hands to catch the white part. The white part will easily slip through your fingers, while the yolk will stay in your hand.

Add cream of tarter


And whip until soft peaks form.


This is what it should look like. 


Once you've reached the soft peak stage, slowly add in the sugar


Then the vanilla


Beat until stiff peaks form. I know that it's ready when this happens:


Now fold in the chocolate chips


At this point, feel free to take a taste test. You will hear the Hallelujah Chorus and then wonder why something this amazing has not touched your taste buds before.

Use spoons to drop on wax covered baking sheets. 


Bake at 300 degrees for about 30 minutes. You want them to be dry. Transfer to a wire rack for the ultimate cooling experience.


I wish I could accurately convey to you how wonderful these are.


They are the perfect portion for that "something sweet."

They aren't overpowering with chocolate either. I'm not a huge chocolate fan, so these hit the spot.


They are light and airy as well. Can you see why we are all obsessed with these?


Chocolatey Clouds

Adapted from Skinny Taste 

  • 3 room temperature egg whites
  • 1/8 tsp. cream of tarter
  • 1/2 cup sugar
  • 1 tsp. vanilla
  • 1/2 cup white chocolate chips
  • 1/2 cup semi-sweet chocolate chips
1. Preheat oven to 300 degrees and cover baking sheets with wax paper

2. Beat egg whites and cream of tarter until soft peaks form

3. Gradually add in the sugar, then the vanilla. Beat until stiff peaks form

4. Fold in the chocolate chips

5. Drop by tablespoons onto cookie sheets and bake for 30-40 minutes.

***

If you're gluten-free, make these immediately.

If you know someone is who is gluten-free, make these for them immediately.

If you're not gluten-free, make these immediately.

That concludes my advice for the day.

Enjoy!

Kaci

Tuesday, March 27, 2012

Get Your Game Day On!

I always have myself a little mourning session right after the Superbowl. Even though I'm excited for spring and warmer weather, I am slightly depressed because the football season is over and I have to wait several months to see grown men fight over a tiny football a football game.

It's terribly upsetting.

This recipe I'm about to share would be perfect for game day on a cold winter day. However, it would work perfectly for the March Madness games coming up. It's easy to make, throws together quickly and is a guaranteed crowd-pleaser.

Take 4 potatoes...
 

Cut into slices approximately 1/8" thick and throw into a big pot 


Cover potato slices with cold, salted water. Put on high heat to boil. Once it is boiling, leave it on for 4-5 more minutes. When the 4-5 minutes are up, carefully pour into a colander.

Then lay out a lot of paper towel. Put each individual slice on the paper towel. Don't leave them in the colander or they will continue to cook and become mushy. I wouldn't know though. It's just a rumor I heard.

WARNING: The slices will be hot when you transfer them from the colander to the paper towel. But go ahead and sacrifice your fingers, it's worth it. 

Then take another paper towel and pat the lovely little slices dry. 


Take some non-stick spray and give your baking sheet a nice, light coat. 

Next you're going to pick up your freshly bathed and dried slices and lay them on a baking sheet so they overlap. 

Spray the potatoes with some cooking spray.

Then sprinkle salt and pepper on the pretty spuds.

Then sprinkle some cheese and bacon bits on 'em. No specific measurement, just sprinkle to your little heart's content.


Bake at 375 for 12-14 minutes. 

We loved these! So much, that I couldn't even snap a picture when they came out of the oven because my family inhaled them. Vultures, I tell you. 

Cheesy Potato Slices For A Crowd
*Serves 8

Adapted from Vittles and Bits 

  • 4 potatoes, sliced approx. 1/8" thick
  • Cooking spray
  • Shredded Cheese
  • Salt & Pepper
  • Bacon Bits


1. Preheat oven to 375 degrees

2. Wash and slice potatoes. Put potato slices in a large pot. Cover with cold water, add salt and set to boil. Boil for 4-5 minutes.

3. Pour slices into a colander and drain. Transfer slices to paper towel and pat dry.

4. Grease baking sheet. Lay potato slices on baking sheet.

5. Spray with cooking spray, sprinkle with salt, pepper, cheese and bacon bits.

6. Bake 12-15 minutes.

***
BONUS TIME!

I like to treat you right here at AIC (that's Adventures In Cooking), so I'm giving you a 2 for 1 deal. 

You're welcome. 

This, my friends, is Chipotle Ranch


Also known as, ohmanthisissogoodiwanttoputitoneverything.

It's a perfect sidekick to the Cheesy Potato Slices For A Crowd. And, chances are, you already have everything to make it.

Chipotle Ranch

Adapted from Vittles and Bits
  • 1 tbsp. ranch dressing
  • 3 tbsp. sour cream
  • 1/4 tsp. chili powder
  • 1/4 tsp. cayenne*
  • 1/8 tsp. salt
  • 1/4 tsp. garlic powder
* I like it pretty spicy but if you're not sure how spicy you want it, I recommend cutting the cayenne in half and adding a little more until it suits your taste.

1. Mix all the above ingredients and serve.

This only made enough for two people. So if you are serving a large crowd, adapt the measurements accordingly.

***

The Cheesy Potato Slices For A Crowd are really good, but the Chipotle Ranch just takes them over the top. If spicy ranch doesn't tickle your fancy then you can serve the potatoes with sour cream or plain ranch. 

I hope you enjoy!

Kaci

P.S. What's your favorite game day food?

Mine is big bowl of chili on a cold Sunday.

Monday, March 26, 2012

Pronunciation Station

A few days ago, my dad was reading a recipe that I had pulled up on my iPad. He was saying the name of the recipe out loud and when he got to the the word "quinoa" he got the "qu" sound out, then proclaimed, "if you can't pronounce it, you shouldn't eat it." I promptly told him that it is pronounced keen-wa. He pretended not to hear me. I think that was his attempt to ensure he will never have to eat quinoa.

I'll keep you updated.

Speaking of being able to pronounce ingredients, have you ever read the ingredients of a granola bar? No? Let me help you out with that.


Kinda gross, right? What are glyceryl lacto esters of fatty acids and BHT? I don't really want to eat that.

That being said, I introduce to you Homemade Granola Bars!

These babies are crazy addictive and contain no suspicious ingredients. The best part? They take 10 to 15 minutes to throw together. 

 In the food processor goes almonds, pecans and oatmeal.


Process until crumbly. Don't over process though! 


Now, pour into a large bowl. Roughly chop the remaining pecans and almonds, then add them, the remaining oats, and craisins to the processed mixture. 


Go ahead and set them aside. In a saucepan, combine coconut oil, honey, salt and almond and vanilla extract. Stir and set over medium heat.


We will return to this recipe, but first, a message from coconut oil:

I've never cooked with coconut oil before, but let me tell you, it gives these granola bars the best buttery flavor. You can find it at Food Pyramid in the health food section.


Back to the show.

Go ahead and keep stirring. Don't leave the pan though, it heats up pretty quick. Once it starts to foam, give it 15 more seconds, then remove.


Pour your hot mixture into the dry ingredients and stir like crazy. 


Once it cools down a little, not a whole lot (Sorry. This blog isn't called Adventures in SPECIFIC Cooking), stir in some white chocolate chips.

Once you stir it in, the white chocolate will melt a little. That's okay. A little melted chocolate never hurt anyone. Right? Well, maybe it has. Okay, don't quote me on that. 

After you stir it all together, pour into an 8x8 pan lined with waxed paper


At this point, you can use the bottom of a glass, a spatula, or like me, a mixture of both. Either way, flatten the mixture. You're going to want to push on the stuff really hard so it stays together. 


After it's all together, go ahead and sprinkle some more white chocolate chips on the top and push in gently with your fingers. 


Now comes the hardest part. Fold the excess wax paper over the top and put in the refrigerator for 4 hours. I know. I know that it's going to be hard and you're going to want to eat them immediately, but I promise you that it will be worth it. 

After 4 long, agonizing hours, pull out the bars and cut into 16 pieces. Then, using the wax paper, pull the granola bars out of the pan. They will easily break apart. Resist the urge to eat the whole pan and store in the fridge. If you store it on the counter, the bars will fall apart. Not that I know from experience or anything.


These bars are amazing. I think one of the greatest parts about them is that they are customizable to your tastes. Do you like pretzels and chocolate? Totally doable. Just substitute the craisins and white chocolate chips. Or what about raisins and butterscotch chips? The possibilities are literally endless. 


These bars are out of this world. I love eating one for breakfast with my coffee. It keeps me full for a few hours without weighing me down like a heavy breakfast usually does. They are something you can feel good about eating and giving to the ones you love.

Homemade Granola Bars with Craisins & White Chocolate
Adapted from Iowa Girl Eats
  • 1 cup whole almonds
  • 1 cup pecan halves
  • 1 cup old fashioned oats*
  • 1/2 cup Craisins
  • 1/4 cup + 2 tbsp. honey
  • 3 tbsp. coconut oil
  • 1/2 tsp. salt
  • 1/4 tsp. vanilla extract
  • 1/4 tsp. almond extract
  • dash of cinnamon
  • 1/2 cup white chocolate chips
 *I don't have a reaction to normal oatmeal, so I did not use gluten-free oats.

1. Add 1/2 cup of almonds, pecans and oats to a food processor. Process until crumbly, then add to a large bowl. Roughly chop remaining almonds and pecans and add them to the bowl. Throw in the remaining oats and 1/2 cup of craisins.

2. In a saucepan, add honey, coconut oil, salt, vanilla and almond extracts and put over medium heat. Stir continually. Once it starts to foam, keep on heat for 15 more seconds. Pour over dry ingredients and stir. Add in the white chocolate chips and stir.

3. Pour in an 8x8 pan lined with wax paper and flatten. Chill for at least 4 hours.

4. Cut into 16 pieces and store in the refrigerator or freezer.

***

I hope you enjoy these! Please comment below and tell me if you made them and what combinations you used or just let me know what combinations you would use. I love new ideas!

Kaci

P.S. What is the one thing you snack on everyday?

For me, it's cheese. It's so not waistline friendly, but I love it. 

Sunday, March 25, 2012

Starting Off With A Bang!

I tried a lot of recipes this weekend and I will share them all with you, but this is the perfect dish to kick off this blog. When I tell you that you need to make this as soon as possible, I mean it. It also is probably the easiest and most flavorful pasta dish ever.

My whole family loved this dish. This is amazing because

1. My dad hates (HATES) pesto.

2. My sister won't eat anything green and doesn't like pasta.

So if they like it, I can guarantee you'll love it.

Okay...to the recipe! (said like "TO THE BATCAVE")

Don't worry about it.

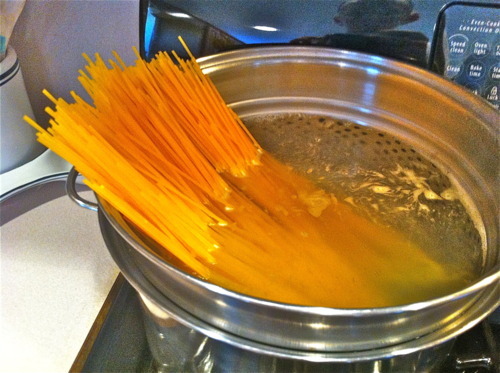
First, cook some pasta. This is Mrs. Leeper's corn pasta (gluten-free) and it is fabulous. You can obviously use normal pasta. Obviously.

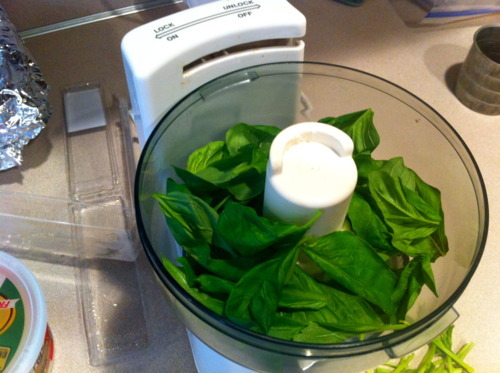
While the pasta was doing its thing, I took some yummy basil and dropped it in the food processor

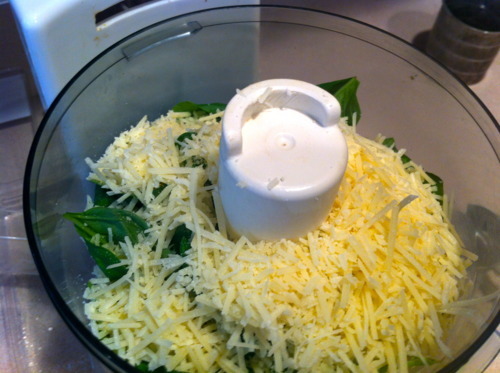
Then the Parmesan cheese

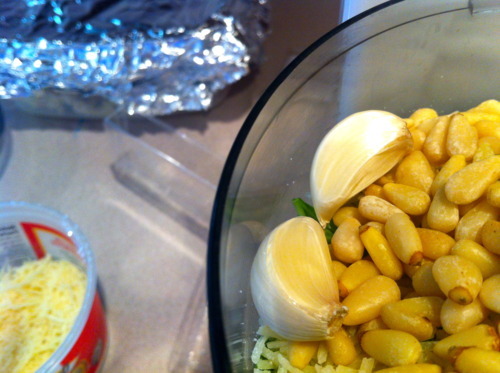
Pine nuts and garlic came to the party

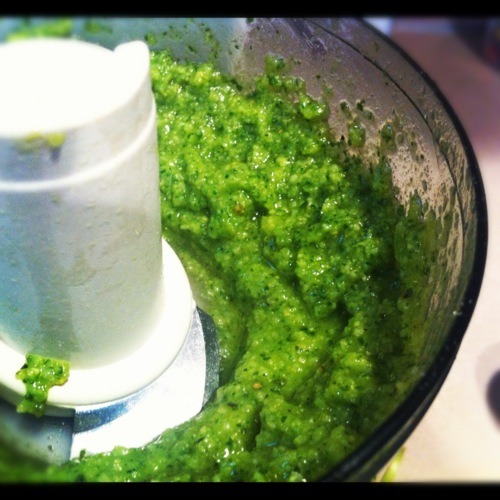
I then threw in the salt and pepper, gave it a whirl and then drizzled in some olive oil

This smells amazing. I literally walked around my house with this stuff making every one smell it.
Except my dad. Please refer to #1 above.
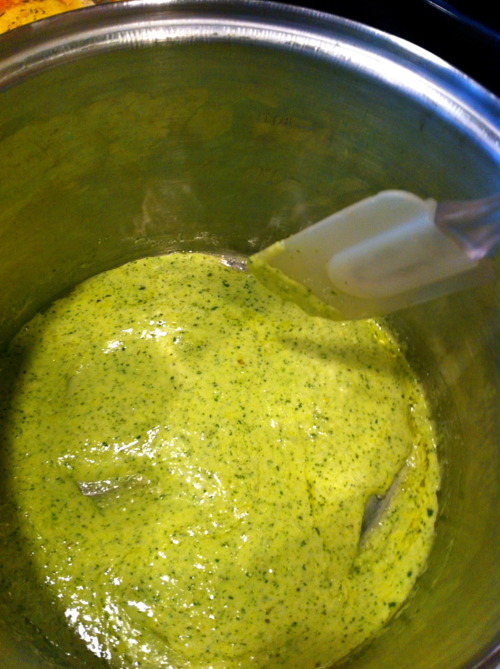
Butter and heavy cream are melted in a large pot then I added the pesto, stirred it together and let it simmer for a few minutes.
SIDE NOTE: I meant to get a picture of the butter and cream in the pot, but right when I put the butter and cream in, my sister dropped four plates on the floor, breaking all of them and halfway ripping off her toenail. Appetizing, right?

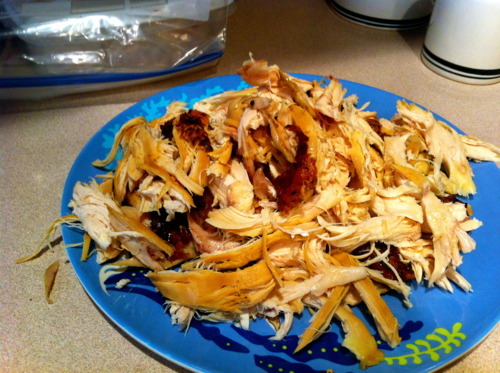
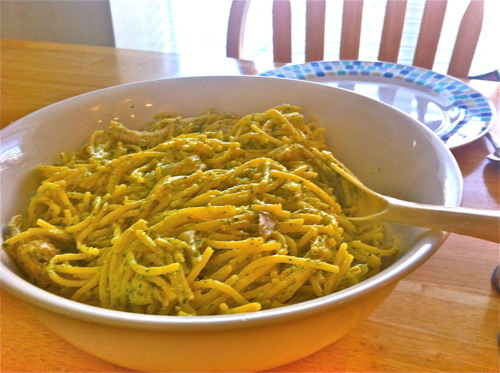
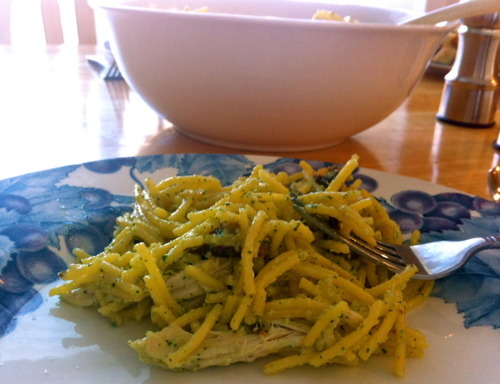
Add remaining Parmesan cheese, stir to melt then gently toss in the pasta and add some rotisserie chicken.

Andddd....VOILA! Everyone will be incredibly impressed with your culinary skills. And tummies will smile.

That's a win-win.

Rotisserie Chicken Pasta with Pesto Cream Sauce

Adapted from Kevin and Amanda
  • 3/4 cup fresh basil leaves, packed
  • 3/4 cup grated Parmesan cheese, divided
  • 3 tablespoons pine nuts
  • 2 cloves garlic, peeled
  • 1/2 tsp kosher salt and coarsely ground pepper, each
  • 1/3 cup extra-virgin olive oil
  • 1/2 cup heavy cream
  • 2 tablespoons butter
  • 12 oz Mrs. Leeper's corn spaghetti pasta
  • Roughly 1 rotisserie chicken, cut into pieces.
1. Bring water to boil, then add 1 tbsp kosher salt and pasta, and cook until al dente. Drain the pasta and set aside. Meanwhile, make the pesto.

2. Add basil, 1/2 cup Parmesan cheese, pine nuts, garlic cloves, and salt and pepper to a food processor. Process while slowly drizzling in olive oil. Add the cream and butter to a large bowl set over medium heat. Pour in the pesto, stir until well combined, and let simmer for 3 minutes. Turn off heat, and add the the remaining 1/4 cup Parmesan cheese, and stir until melted and combined.

3. Add the drained pasta to the sauce and stir together. Now, you can either serve and top with hot rotisserie chicken or if your chicken is already chopped and is cold from the fridge, add it to the pasta and stir together for 2 minutes to heat up the chicken.
--------------------------------------------------------------------------

Make this soon. As in now. It's the perfect pasta dish and it's so quick and wonderful.

Good luck!

Kaci